Introduction
Have you ever played a game that had a strange mashup of textures in different visual styles, or different color levels? Or perhaps you got a couple texture mods for a game you liked, but in game it just looked strange because the quality was different? It doesn't look good, right?
Every game has it's own visual style; realistic, cartoon, anime, ect.. Some games even use a combination of different styles for a certain effect. This is true for Alicia Online.
In Alicia Online, human characters are an anime style, while most of the game world is semi-realistic. Horses are the most realistic aspect of the entire game - from their models, textures, and even how they move through the world. But, that said, they are not photo-realistic. Photo realism is literally taking a photo and photoshoping it onto a model to use as a texture.
However, the horses in Alicia Online are not photo-realistic. If you make a coat that is photo-realistic, it will look strange and out of place with the rest of the game world. While it may be done well, it wont be visually appealing when actually put in game. The best way to make a visually appealing horse coat that stays as true as possible to the game's original style is to use a very basic and easy method using tools that the original NTreev designers have left behind.
If you are new to texture design and want to make Alicia Online horse coats, follow this guide to be well on your way to making coats quickly and pain free!
For this tutorial I use Photoshop CC 2014, though nearly all of the mechanics should be the same across other programs, such as Gimp and Sai.
|
Tools & Programs
|
Brushes
|
Step 1 - Pick your base texture and find a reference
Pick a base texture from the original coats (you can download a coat from aliciagame.com/editor). I use Skin007 because it is nearly pure white, making its texture easy to see and easy to build off of.
If you want, find a reference of a horse you would like to use; it doesn't even have to be of a real horse. I suggest a high quality side profile without objects, such as tack, blocking your view of the coat colors and markings.
If you want, find a reference of a horse you would like to use; it doesn't even have to be of a real horse. I suggest a high quality side profile without objects, such as tack, blocking your view of the coat colors and markings.
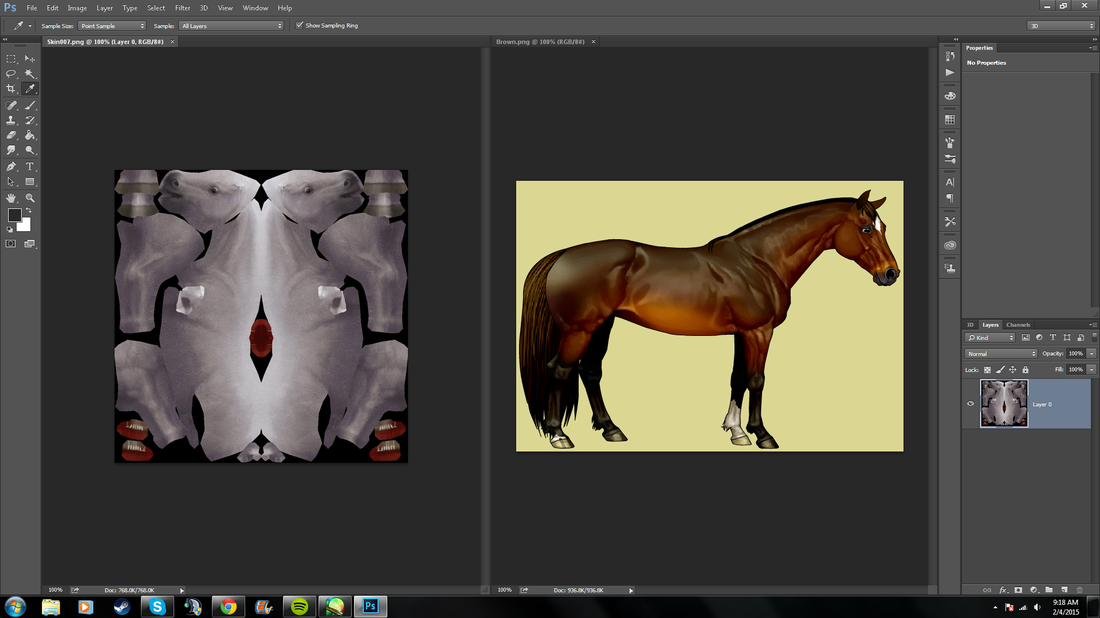
Reference image courtesy of Horse Isle 2. Artwork belongs to the original creator.
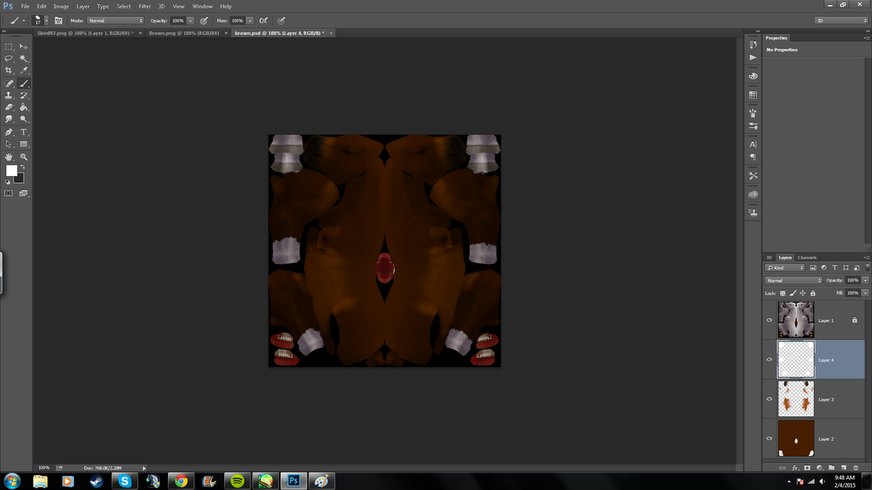
Step 2 - Set up your texture layer

Now that you have your reference and your base texture, you need to set up your texture layer.
While you have your base texture selected, change it's layer mode from normal to multiply. Once you have your layer mode set to multiply, lock the layer. To lock a layer, simply click the icon that looks like a lock underneath the layer mode.
For Sai users, select the layer you want to lock then click the box next to Preserve Opacity.
When you layer is locked, it will show a lock icon next to the layer name. In Sai, it will say Locked underneath your layer name.
Locking a layer will keep you from accidentally coloring on it. This will also prevent you from changing layers modes, layer opacity, ect.. If you need to unlock the layer for any reason, simply click the lock icon again.
Step 3 - Begin editing!
Now that you have your texture layer set up, it's time to create your coat.
First, create a new layer underneath your texture layer (your texture layer should be on top of your color layers). On this new layer, bucket fill your base coat. If your layering is done correctly, you should now be able to see your base coat through your texture layer.
Once you have your base coat, erase the color that is covering the mouth parts.
When you are done cleaning up your base coat you can now work on any details your coat has, such as black legs, dapples, or white markings.
I like to keep my base coat layer separate from my detail and markings layers, though it is up to you on how you want to layer your image. I do this so that just in case I make a mistake, or decide the hue of my base coat doesn't look right, I don't have to completely start over.
Tip:
|
For most markings, I use the Paint Pattern brush from the Horse Pattern Pack (Cow Pattern 1 in photoshop's brush selector).
In Sai, you can create a similar effect by selecting the Airbrush tool, then open the drop down menu where it says (simple circle), and select Spread. |
For white markings, I use pure white, since that is how it looks on most real horses. The original designs seem to use a near-white of the base color. How you want to do it is up to you.
For black markings, such as black legs, I use a near black of the base coat. A pure black can hide your texture, making those parts of the model look like it's made out of plastic. |
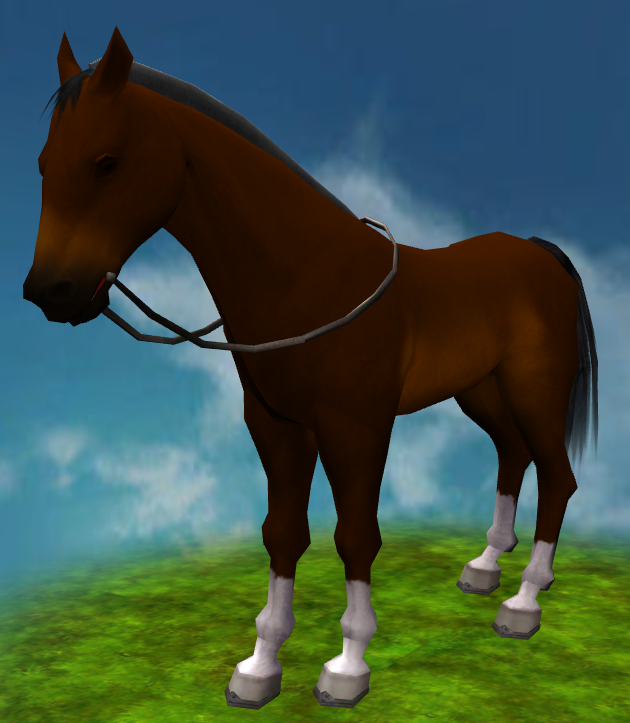
Step 4 - Check your work
You can check your work for seams here : aliciagame.com/editor
Just click the 'upload' button and select wherever you saved your texture to. After a few seconds, your texture will be placed on the model.
Click and drag to view the horse at different angles. You can also change your horse's pose, mane, and tail color. You can even download the mane and tail texture maps to edit them as well!
Finished!
If you are happy with your work, then you're done! Make sure to save your file not only as a .png or .jpg, but also in a format that supports layers (.psd, .sai, .gimp).
If you want to take a screenshot of your finished texture on the model, simply press the Print Screen key on your keyboard, then paste your image into paint, crop, and save.
If you want to take a screenshot of your finished texture on the model, simply press the Print Screen key on your keyboard, then paste your image into paint, crop, and save.